Friday, 31 May 2013

How-to: Natural eye make-up look.

Hi Everyone!

I hope you all are having a better summer than I am...the weather is rubbish here in London! Today I will be doing a step-by-step on one of my natural looking makeup looks! I will be focusing on the eye area mainly! I hope you follow and you will get the hang of it in no time! :)

Remember the first rule of thumb is to prep and prime your entire face! Wash your face properly and then moisturise it! I use Elizabeth Arden Daily Moisture SPF 15, on my face as it is really dry and this cream really keeps my face moist without the extra shine!

1. Prep and prime your eyes, I have used the two products below to get my eyes ready for the eyeshadow. First I have used urban decay's primer potion all over my lids, and then I used MAC paintpot, in Soft Ochre all over the lids. Using a primer is very essential in keeping those pigments on your lid, for minimising lines/cakey-ness of your shadow and for longevity.

(Prep and Prime eyes) Urban Decay Primer Potion & MAC Soft Ochre

2. Below I will be showing you the step-by-step of the colours I have used, and which order I have used them. The palette that I have used for this look, is by Sleek Makeup, in 'Oh-so special'.

Sleek Make-up palette in Oh-So-Special (each colour has its own unique name in this
palette; 1: The Mail; 2: Boxed; 3: Wapped Up; 4: Celebrate; 5: Noir) 

3. Now I will be talking about the the step-by-step of how to apply the actual colours, and I have attached pictures of each step in a collage below, with the final look too. Enjoy! :)

4. The first frame from the collage below is after I have applied my primer and base.

5. Next, you need to apply the lightest shade of whatever colours you are using; here I have chosen a very natural colour, called 'The mail' from my palette, which does not look too far off from the primer and base colour in frame 1.

6. Next, I have used colour 2 and 3 on the crease of my lids and blend inwards using your brush, about two-thirds of your lids. (sorry if the colours are not showing properly! I really don't know what's wrong with the lighting and camera!).

7. Now apply number 4 and 5 on the outer crease of your eye and blend slightly inwards, not as much as the previous step. lastly, apply your eye liner and mascara! All done!


Hope this was helpful...till next time!!

Ciao!

Y x.


Wednesday, 29 May 2013

Beauty Tip #2: Beauty Blender vs. Foundation Brush

Hi Everyone!

I do hope the last tip that I have posted about was useful to someone or another! I will be trying to keep this Blog updated and up and running as much as I can! I have literally just finished uni...so as some of you can imagine I have quite a bit of time on my hands.

Anyway, back to the topic at hand...today I will be talking about a recent discovery of mine...I know some of you may have discovered this a loonngg time ago, as it has been on the market for a very long time. But I thought why not write a little post about this very useful makeup tool? Honestly at first when I saw the product, known as the Beauty Blender...I thought it was probably overrated...but I recently purchased the item and I have to say it was really really useful!

I was watching a video by a very popular artist, GossMakeupArtist (an excellent MUA! personally I think his one of the best Youtube vloggers around!) and he mentioned this tool and how it is one of the must have tools when doing your foundation. So I bought it recently...and since I have just started up my new Blog I thought why not do a comparison?

The two tools I used...the beauty blender (pink one...sorry I just used it so
looks a little dirty) and on the right is my foundation brush


Below are the result...as you can see, on the left, I used the beauty blender to apply a swatch of foundation, which I have used the same amounts of, to keep this as a fair experiment...and you can see that the blend of is very very different!! The beauty blender works wonders!! It truly does leave the skin looking very airbrushed and light...almost feels as though I am not wearing any foundation. While, on the other hand (not so literally)...you can see that using the brush has left quite a few streaks on my skin, even whilst blending...and I can honestly tell you that I swiped the brush on my hand a good five times.

Using the beauty blender does feel quite effortless in comparison to a brush! This make-up tool can be found in most make-up stores...I bought mine from Amazon for £5 (or so)...as the prices for this thing are quite bumped up! Hope this little tip helped!! Please like...comment (suggestions and please be nice!!)...follow +1 it or something!! and lastly...I hope this informative!!

Ciao!

Yasmin x.  


Left Beauty Blender and Right using a normal foundation brush

Tuesday, 28 May 2013

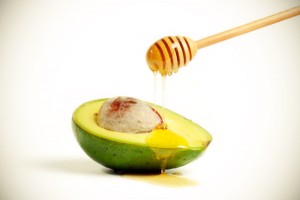
Beauty Tip #1 Avocado & Honey face mask

This tip is very useful for all those who suffer from dry skin! I have personally tried this little concoction and I would definitely say it has worked wonders on my face! Plus the thought of this little fruit being so rich in vitamin E gives it that extra wow factor to me! My skin type is oily/very dry in certain areas, so I would definitely say it has really helped balance out my skin. Please keep reading for more instructions:

Ingredients:
1/4 avocado (ripe and soft)
1/2 tbsp Honey

1. You can use a quarter of an avocado if you do not fancy storing the left over mask mixture after using some. But usually on the net people recommend using half an avocado...not sure why.
2. Peel the skin off of your avocado and mash up using a fork until there are no lumps.
3. Add in your honey...and voila! One skin moisturising mask!
4. Apply the mask on your face generously and wait for 10 minutes.
5. You will feel the mask drying up on your face. Wash off and pat dry.
6. Now feel how smooth your skin feels!

Hope this helps!! Will be back with some more tips when I discover them!

Ciao!
Yasmin x

Wednesday, 22 May 2013


Summer Look #1.
I have been asked by a friend of mine to start a Blog as she loved this look and many of my other makeup looks that I recently posted on my Instagram (instagram id: Yazzle_91). Hence the first picture to go up on my first ever Blog is this look! I have no idea what I am supposed to do on a blog, but I promise I will learn fast!

To do this look I used:
Clinique super moisture make-up foundation in warm caramel and for contouring I used a foundation by L.A. colours in Bronze. I have used a normal sponge for blending the two shades on my face, after making it damp of course! But I will be buying the infamous beauty blenders very soon for my foundation! As I have come to notice that using a sponge instead of the brushes does in fact give a more flawless and airbrushed look in comparison to using foundation brushes, which has left me with streaks of foundation on my face!
I feel that using another foundation which is at least a shade or two shades darker than your complexion really blends in well and looks great for contouring!
On my cheekbones I used a blusher by nyx in Taupe...which enhances the contouring around the cheekbones.
and Lastly, I used a lipstick by KIKO Cosmetics in number 918.

That is all for now! I hope this was a little informative to whomever shall read this Blog, Please be nice! Thanks!

Y x.